Backing up your photos and files is essential in today’s digital world. Whether it’s cherished memories or important documents, losing data can be frustrating and costly. Fortunately, backing up is easier than you might think. In this guide, we’ll explore simple methods to help you safeguard your digital content effectively.
Why Backing Up Your Data Matters
Data loss can happen for various reasons — computer crashes, accidental deletion, theft, or hardware failure. Photos, work files, and personal documents may be irreplaceable, so having a backup ensures you can recover them quickly.
Common Backup Options
There are several ways to back up your data. Let’s take a closer look at the most popular and reliable methods.
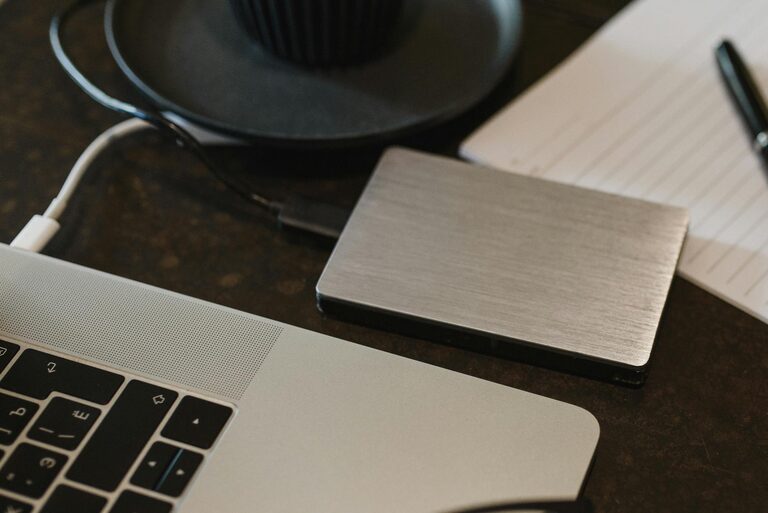
1. External Hard Drives
An external hard drive is a straightforward and affordable way to store a copy of your files.
– Pros: Large storage capacity, fast transfer speeds, one-time purchase
– Cons: Can be lost or damaged, needs to be connected to your computer for backups
To use an external drive effectively:
– Choose a drive with enough space (a few hundred gigabytes or more)
– Connect via USB and manually copy files or use backup software
– Store the drive in a safe place when not in use
2. Cloud Storage Services
Cloud storage keeps your files on remote servers accessible via the internet.
– Pros: Automatic backups, accessible anywhere, secure with encryption
– Cons: Requires internet connection, storage limits on free plans
Popular options include Google Drive, Dropbox, Microsoft OneDrive, and Apple iCloud. Many offer free storage quotas, and you can pay for additional space if needed.
3. USB Flash Drives
For smaller backups or transferring files, USB flash drives offer portability.
– Pros: Compact, inexpensive, easy to use
– Cons: Limited storage size, easy to lose
Use flash drives for quick backups of essential files or photos you want to carry with you.
4. Network Attached Storage (NAS)
NAS devices are dedicated storage devices connected to your home network.
– Pros: Centralized storage accessible by multiple devices, often with automatic backup features
– Cons: Higher initial cost, requires setup
NAS is ideal for tech-savvy users or households with many devices requiring backup.
Tips for Effective Photo and File Backups
Implementing a backup system requires some planning. Here are best practices to ensure your backups are reliable:
Maintain Multiple Backup Copies
The golden rule is to keep at least two backups in different locations. For example, one backup on an external hard drive and another in the cloud.
Schedule Regular Backups
Data changes regularly, so establish how often you’ll back up. For frequently updated files, consider daily or weekly backups.
Organize Your Files
Keep your photos and files well-organized in folders named by event, date, or category. This makes locating backups easier.
Test Your Backups
Occasionally, check that you can open files from your backup. This ensures your backups aren’t corrupted or incomplete.
How to Back Up Photos Specifically
Photos are often the most sentimental files we own. Here’s how to protect them effectively:
Enable Automatic Cloud Sync on Your Phone
Most smartphones offer options to automatically upload photos to the cloud, such as Google Photos or iCloud Photo Library. This reduces the risk of losing images when your device is damaged or lost.
Use Backup Software for Computers
There are many free and paid applications that can automate photo backups from your computer to external drives or cloud services. Examples include macOS Time Machine or Windows File History.
Create Organized Photo Archives
For large collections, consider creating multiple archives by year or event. Store them across different backup media to reduce risk.
Step-by-Step: Backing Up Files on Windows and macOS
Windows
- Connect an external hard drive or set up a cloud storage account.
- Use the built-in File History feature (Settings > Update & Security > Backup).
- Select the drive or cloud location.
- Turn on File History to automatically save copies of your files.
- Connect an external drive.
- Open Time Machine from System Preferences.
- Select the drive as your backup disk.
- Time Machine automatically backs up your system and personal files.
macOS
When to Replace Your Backup Drives
Backup devices have a lifespan and can fail over time. As a guideline:
– Replace external hard drives every 3-5 years.
– Monitor for any unusual noises or errors.
– Keep your backup data updated during transitions to new devices.
Final Thoughts
Backing up your photos and files doesn’t have to be complicated. Whether you choose external drives, cloud storage, or a combination, the important part is to take action now. By creating multiple backup copies and keeping them up-to-date, you protect your digital memories and important documents from unexpected loss.
Start today — your future self will thank you!